Back in the era of basic phones, we can still remember how people make effort in getting ‘special’ ringtones. Some even subscribe for new ringtones. But as cell phones evolved and right now and we now have smartphones, this factor has been overlooked.

Android phones—sad to say— even with its multi-tasking ability, can be pretty boring with its sound notifications. In the office or even at home, you might catch yourself checking out your smartphone when you heard a notification ringtone. Only to find out that it wasn’t yours but your colleague’s or your sibling’s. If you don’t know how to change that irksome default Android ringtone of yours, then this tutorial is right for you.
Directions
(Note: This is applicable for Android 5.0 Lollipop smartphones but can work with the previous versions as well.)
- Go directly to your Settings menu screen (for Android 5.0 users, just swipe down from any screen and tap on that ‘Gear’ icon).
- Choose ‘Sound & notification’ option and it will direct you to several options.
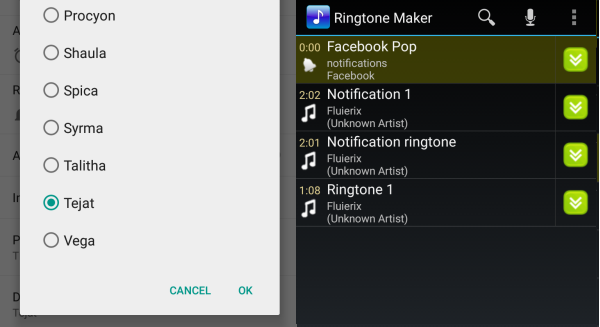
- What you’re going to tap on though is the ‘Default notification ringtone.’
- From the list given, choose which sound more appealing to you and tap on it.
For a more customized tone:
- Download Ringtone Maker from Google Play Store and install it on your phone.
- Upon installing, you will be provided by the app of all the mp3 files you have right in your device.
- Choose a file by tapping on the double green arrow situated beside its name.
- Choose Advanced>> Set as Notification>> OK.
- You have your very own favorite song as your customized ringtone.
