To those who didn’t know, Facebook Pixel is an updated form of Conversion Tracking Pixel for measuring, optimizing and building audiences for your ad campaign strategies. Since Facebook will now remove the Conversion Tracking Pixel this year, it’s very necessary for internet marketers to know how to use this.
If you’re an internet marketer and interested in using Facebook Pixel, you can follow these simple, easy-to-do steps.
Go to Facebook Ads Manager then choose the Tools Tab > Pixels. Give a name to your new pixel, check out and agree to the Facebook Pixel Terms then Create Pixel. You can click the ‘Install Now’ option if you want to proceed or ‘Email Pixel Code’ to your website developer.

Go to your personal website (e.g. WordPress, Blogger, etc.), copy the Facebook Pixel code and paste it between the <head> and </head> tags in your website. In WordPress, go to Appearance > Editor and look for the header.php file.

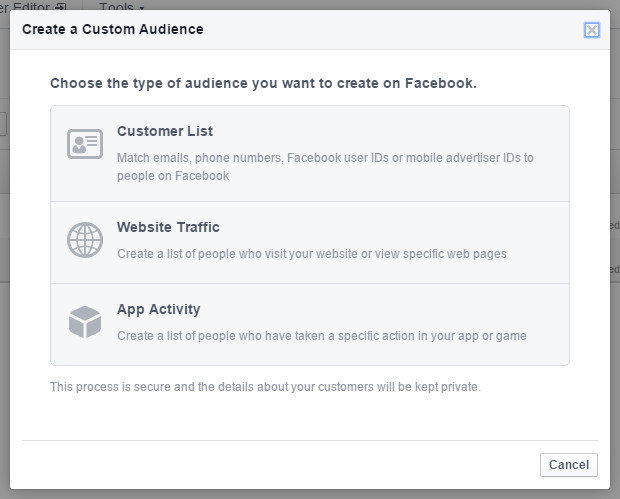
You can also create a custom audience for your brand during Facebook Marketing in order to avoid fake audiences. To do this, go to Facebook Ads Manager, choose Tools Tab > Audiences. Under the Create Audience section, choose Custom Audience.

From here, you have three options, namely Customer List (for getting customer details), Website Traffic (for monitoring website visits) and App Activity (for getting lists in improving your app).

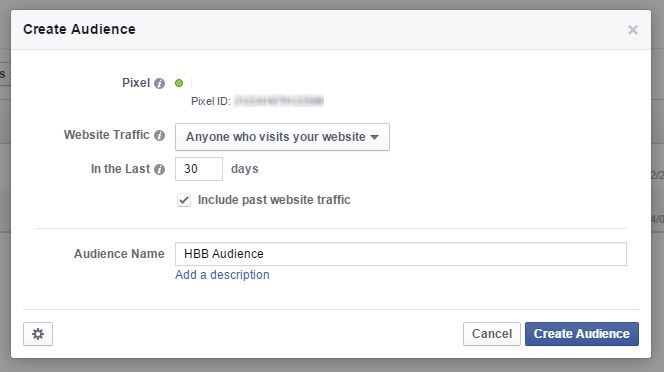
In the next window, just leave the default values then choose Create Audience.

Keep in mind, however that since this is still new, better expect that Facebook will make some nice changes in this tool as the time passes.
