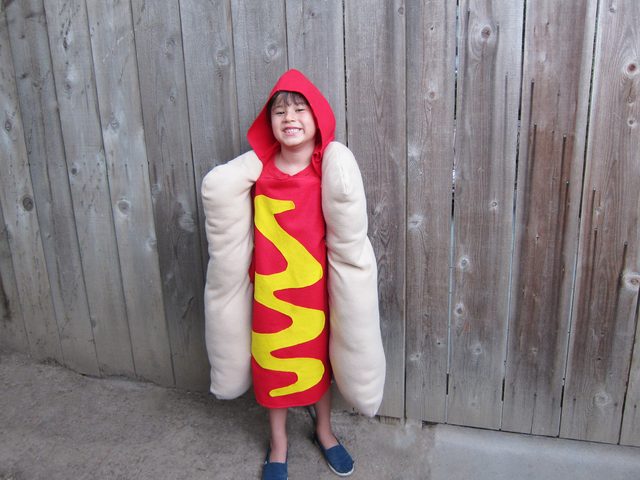
If you want to make food costumes for your kids, then the hot dog comes as a topper on the list. It may look difficult to do but it’s actually simple, only that you need a little patience for this project.

Materials
- Sewing machine
- Comfortable fitting T-shirt (for measuring)
- Hooded sweatshirt
- 2 yards of camel-colored fleece
- Pillow stuffing
- 1 yard of red felt
- ½ yard of yellow felt
- 3-inch circle to trace (a roll of duct tape will work)
- Pencil or disappearing ink pen
- Snaps or hook-and-loop fastener
- Hot glue gun
- Scissors
- Needle and thread
- Pins
Directions
Step #1: Creating the Bun
Place a comfortable fitting T-shirt at the center of a two-yard piece of camel-colored fleece. Next, fold both long sides of the fleece into the shoulder points of the T-shirt. Draw circles of 3 inches in size where the armholes are, using the T-shirt sleeves as your guide.
Step #2: Setting the Round Edges
Round the folded edges of the bun (both at the top and the bottom) using a pair of sharp scissors. This should leave the middle edge part of the costume higher than the sides of the bun. Fold the top and bottom edges of the middle part into the center.
Step #3: Pinning and Sewing the Edges
Next, pin and sew the top and bottom rounded edges together. Leave the inside part of the seam open on each side so you can do the stuffing later. Do the pinning and sewing to the top and bottom edges of the middle part as well. After that, turn both rounded portions with the right side out. Pin the circles where the arms should go through. Just in case, you may have to mark the circles again using a pen.
Step #4: Sew and Cut Armholes
Sew the armhole lines, remove the pins as you go and cut away the fabric inside the sewed line.
Step #5: Stuffing and Sewing the Bun
Insert the pillow stuffing and sew the open seams on each side of the bun.
Step #6: Cutting the Hotdog
Cut out two layers of red felt in the shape of cylindrical capsule in the same width as the shirt and a bit longer than the bun. After cutting out, sew just around the edges in order to leave a quarter inch seam allowance.
Step #7: Adding Attachments
Get your needle and thread to sew snaps (or a strip of hook-and-loop fastener) to run down on each side of the bun in order to attach the hot dog to the bun.
Step #8: Create Condiments
Cut a wavy line on the yellow felt encompassing the length of the hotdog (just like how they apply mustard or ketchup along the hotdog in commercials). Glue the felt onto the hotdog and make sure that it lies flat on it.
Step #9: Make Hood
Use a hood as a pattern and cut the pattern into two overlapping red felt, but make sure that there’s a ½ inch allowance.
Step #10: Append the Hood
Sew the hood together and attach the extension (by sewing, of course) to the bottom of the hood.
Now that you have the costume pieces, you can wear it to your kid by putting his or her arms through the holes of the bun. Close the hotdog by joining the attachments together on both sides of the buns. Put the hood on him or her and tuck the flaps into the bun—that’s it!
